
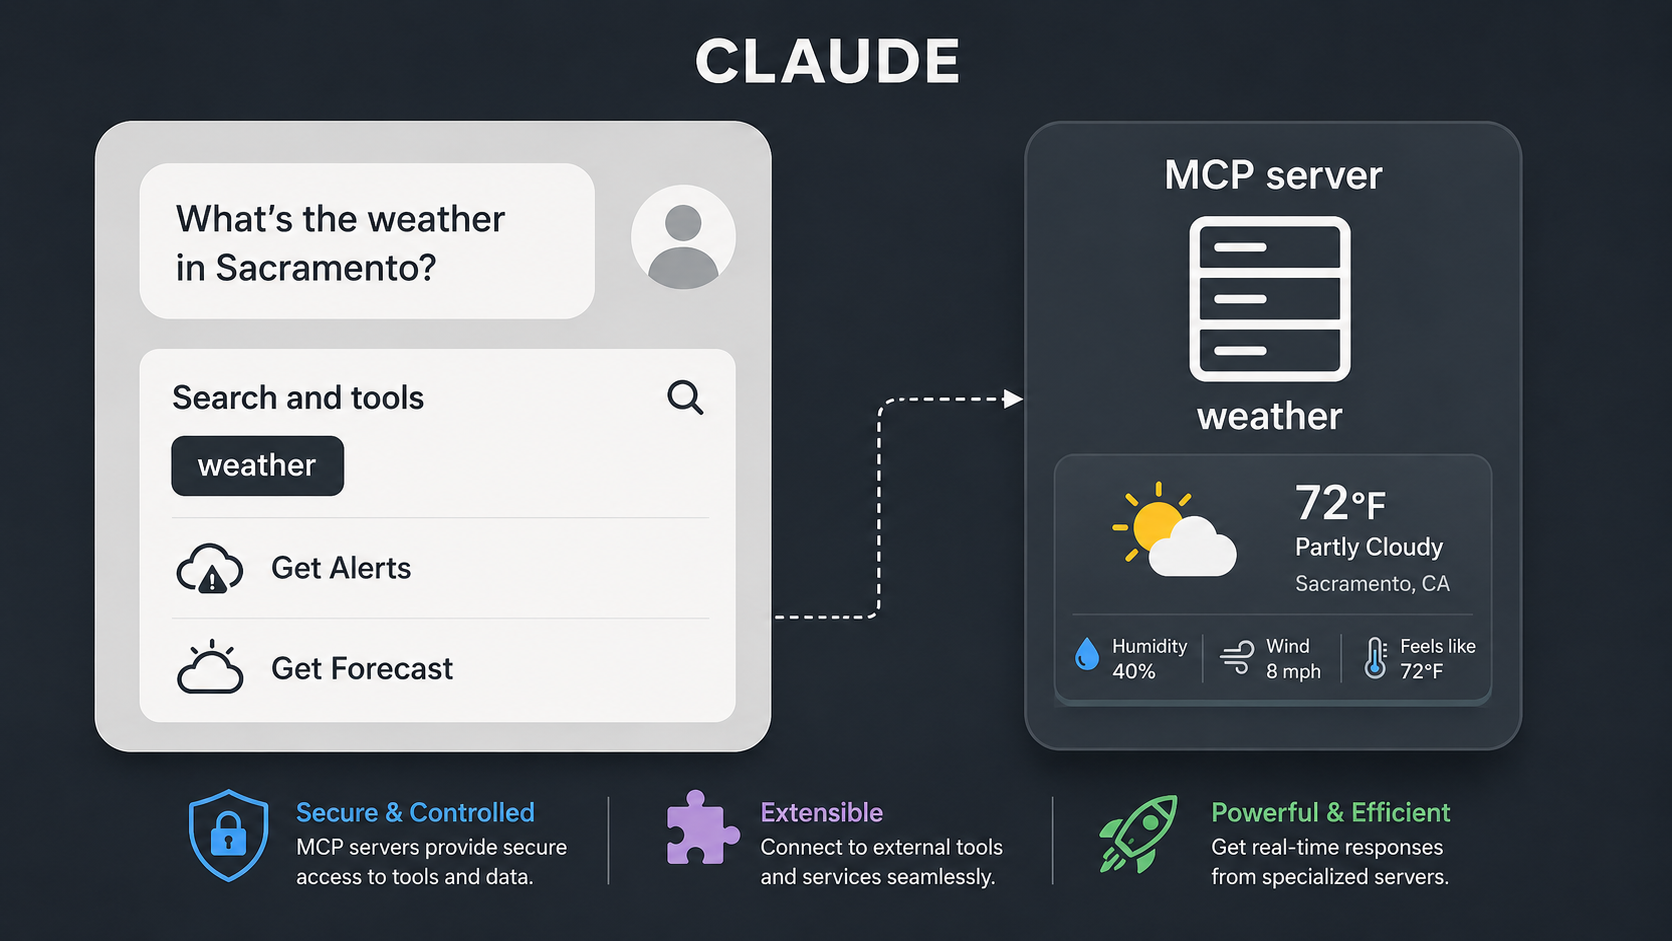
In the era of AI assistants and large language models, the ability to extend their capabilities with real-world data access has become increasingly important. Today, we’ll explore how to build a weather service that AI assistants can use through the Model Context Protocol (MCP), leveraging the free National Weather Service API to provide real-time weather alerts and forecasts.
We’ll create a Python-based MCP server that exposes two primary tools:
- Weather Alerts: Get active weather warnings and advisories for any US state
- Weather Forecasts: Retrieve detailed forecasts for specific geographic coordinates
The best part? This service uses the National Weather Service API, which is completely free, requires no authentication, and provides reliable, government-sourced weather data.
Prerequisites
Before we dive in, make sure you have:
- Python 3.8 or higher installed
- Basic understanding of async/await in Python
- Familiarity with REST APIs
You’ll need to install these dependencies:
pip install httpx mcpUnderstanding the Architecture
Our weather service follows a clean, modular architecture:
- MCP Server: Manages the protocol and tool registration
- HTTP Client Layer: Handles API communication with proper error handling
- Data Formatting Layer: Transforms raw API responses into human-readable formats
- Tool Functions: Exposed endpoints that AI assistants can call
Let’s build each component step by step.
Step 1: Setting Up the Foundation
First, let’s import our dependencies and initialize the MCP server:
from typing import Any
import httpx
from mcp.server import FastMCP

# Initialize FastMCP server
mcp = FastMCP("weather")

# Constants
NWS_API_BASE = "https://api.weather.gov"
USER_AGENT = "weather-app/1.0"
The FastMCP class creates a server instance that will handle all the protocol-level communication. We name it “weather” to clearly identify its purpose. The constants define our API endpoint and a user agent string (the NWS API requires this for identification).
Step 2: Building the HTTP Request Handler
Next, we need a robust function to handle API requests with proper error handling:
async def make_nws_request(url: str) -> dict[str, Any] | None:
    """Make a request to the NWS API with proper error handling."""
    headers = {
        "User-Agent": USER_AGENT,
        "Accept": "application/geo+json"
    }
    async with httpx.AsyncClient() as client:
        try:
            response = await client.get(url, headers=headers, timeout=30.0)
            response.raise_for_status()
            return response.json()
        except Exception:
            return None
This function is the backbone of our service. Let’s break down its key features:
- Async/Await: Non-blocking I/O ensures our service can handle multiple requests efficiently
- Headers Configuration: We specify that we want GeoJSON format data
- Error Handling: Returns None for any error, allowing graceful degradation
- Timeout Protection: A 30-second timeout prevents hanging on slow connections
Pro Tip: Enhanced Error Handling
For production use, consider implementing more detailed error handling:
async def make_nws_request(url: str) -> dict[str, Any] | None:
    headers = {
        "User-Agent": USER_AGENT,
        "Accept": "application/geo+json"
    }
    async with httpx.AsyncClient() as client:
        try:
            response = await client.get(url, headers=headers, timeout=30.0)
            response.raise_for_status()
            return response.json()
        except httpx.TimeoutException:
            print(f"Request timeout for URL: {url}")
            return None
        except httpx.HTTPStatusError as e:
            print(f"HTTP error {e.response.status_code} for URL: {url}")
            return None
        except Exception as e:
            print(f"Unexpected error: {e}")
            return None
Step 3: Creating the Weather Alerts Tool
Now let’s build our first tool — fetching weather alerts for a US state:
def format_alert(feature: dict) -> str:
    """Format an alert feature into a readable string."""
    props = feature["properties"]
    return f"""
Event: {props.get('event', 'Unknown')}
Area: {props.get('areaDesc', 'Unknown')}
Severity: {props.get('severity', 'Unknown')}
Description: {props.get('description', 'No description available')}
Instructions: {props.get('instruction', 'No specific instructions provided')}
"""

@mcp.tool()
async def get_alerts(state: str) -> str:
    """Get weather alerts for a US state.

    Args:
        state: Two-letter US state code (e.g. CA, NY)
    """
    url = f"{NWS_API_BASE}/alerts/active/area/{state}"
    data = await make_nws_request(url)

    if not data or "features" not in data:
        return "Unable to fetch alerts or no alerts found."

    if not data["features"]:
        return "No active alerts for this state."

    alerts = [format_alert(feature) for feature in data["features"]]
    return "\n---\n".join(alerts)
The @mcp.tool() decorator is crucial – it registers this function as a tool that AI assistants can call. The function:
- Constructs the appropriate API endpoint URL
- Makes the API request
- Handles three scenarios: API failure, no alerts, or active alerts
- Formats each alert into a readable structure
Step 4: Building the Forecast Tool
The forecast tool is slightly more complex because the NWS API requires a two-step process:
@mcp.tool()
async def get_forecast(latitude: float, longitude: float) -> str:
    """Get weather forecast for a location.

    Args:
        latitude: Latitude of the location
        longitude: Longitude of the location
    """
    # First get the forecast grid endpoint
    points_url = f"{NWS_API_BASE}/points/{latitude},{longitude}"
    points_data = await make_nws_request(points_url)

    if not points_data:
        return "Unable to fetch forecast data for this location."

    # Get the forecast URL from the points response
    forecast_url = points_data["properties"]["forecast"]
    forecast_data = await make_nws_request(forecast_url)

    if not forecast_data:
        return "Unable to fetch detailed forecast."

    # Format the periods into a readable forecast
    periods = forecast_data["properties"]["periods"]
    forecasts = []
    for period in periods[:5]:  # Only show next 5 periods
        forecast = f"""
{period['name']}:
Temperature: {period['temperature']}°{period['temperatureUnit']}
Wind: {period['windSpeed']} {period['windDirection']}
Forecast: {period['detailedForecast']}
"""
        forecasts.append(forecast)

    return "\n---\n".join(forecasts)
Step 5: Running the Server
Finally, we need to start our MCP server:
if __name__ == "__main__":
    # Initialize and run the server
    mcp.run(transport='stdio')
Complete Code
Here’s the complete, production-ready code:
from typing import Any
import httpx
from mcp.server import FastMCP

# Initialize FastMCP server
mcp = FastMCP("weather")

# Constants
NWS_API_BASE = "https://api.weather.gov"
USER_AGENT = "weather-app/1.0"

async def make_nws_request(url: str) -> dict[str, Any] | None:
    """Make a request to the NWS API with proper error handling."""
    headers = {
        "User-Agent": USER_AGENT,
        "Accept": "application/geo+json"
    }
    async with httpx.AsyncClient() as client:
        try:
            response = await client.get(url, headers=headers, timeout=30.0)
            response.raise_for_status()
            return response.json()
        except Exception:
            return None

def format_alert(feature: dict) -> str:
    """Format an alert feature into a readable string."""
    props = feature["properties"]
    return f"""
Event: {props.get('event', 'Unknown')}
Area: {props.get('areaDesc', 'Unknown')}
Severity: {props.get('severity', 'Unknown')}
Description: {props.get('description', 'No description available')}
Instructions: {props.get('instruction', 'No specific instructions provided')}
"""

@mcp.tool()
async def get_alerts(state: str) -> str:
    """Get weather alerts for a US state.

    Args:
        state: Two-letter US state code (e.g. CA, NY)
    """
    url = f"{NWS_API_BASE}/alerts/active/area/{state}"
    data = await make_nws_request(url)

    if not data or "features" not in data:
        return "Unable to fetch alerts or no alerts found."

    if not data["features"]:
        return "No active alerts for this state."

    alerts = [format_alert(feature) for feature in data["features"]]
    return "\n---\n".join(alerts)

@mcp.tool()
async def get_forecast(latitude: float, longitude: float) -> str:
    """Get weather forecast for a location.

    Args:
        latitude: Latitude of the location
        longitude: Longitude of the location
    """
    # First get the forecast grid endpoint
    points_url = f"{NWS_API_BASE}/points/{latitude},{longitude}"
    points_data = await make_nws_request(points_url)

    if not points_data:
        return "Unable to fetch forecast data for this location."

    # Get the forecast URL from the points response
    forecast_url = points_data["properties"]["forecast"]
    forecast_data = await make_nws_request(forecast_url)

    if not forecast_data:
        return "Unable to fetch detailed forecast."

    # Format the periods into a readable forecast
    periods = forecast_data["properties"]["periods"]
    forecasts = []
    for period in periods[:5]:  # Only show next 5 periods
        forecast = f"""
{period['name']}:
Temperature: {period['temperature']}°{period['temperatureUnit']}
Wind: {period['windSpeed']} {period['windDirection']}
Forecast: {period['detailedForecast']}
"""
        forecasts.append(forecast)

    return "\n---\n".join(forecasts)

if __name__ == "__main__":
    # Initialize and run the server
    mcp.run(transport='stdio')
Testing your server with Claude for Desktop
To do this, open your Claude for Desktop App configuration at /Users/mycloudjourney/Library/Application Support/Claude/claude_desktop_config.json in a text editor. Make sure to create the file if it doesn’t exist.
You’ll then add your servers in the mcpServers key. The MCP UI elements will only show up in Claude for Desktop if at least one server is properly configured.In this case, we’ll add our single weather server like so:
{
  "mcpServers": {
   "weather": {
      "command": "/Users/mycloudjourney/.local/bin/uv",
      "args": [
        "--directory",
        "/Users/mycloudjourney/Desktop/AI & ML/ClaudeDesktop/weather",
        "run",
        "weather.py"
      ]
    }
  }
}
This tells Claude for Desktop:
- There’s an MCP server named “weather”
- To launch it by running uv –directory /ABSOLUTE/PATH/TO/PARENT/FOLDER/weather
Save the file, and restart Claude for Desktop.
Test with commands
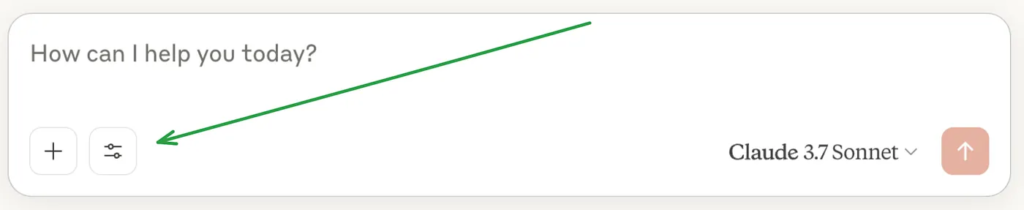
Let’s make sure Claude for Desktop is picking up the two tools we’ve exposed in our weather server. You can do this by looking for the “Search and tools” icon:
After clicking on the tools icon, you should see weather MCP server listed:
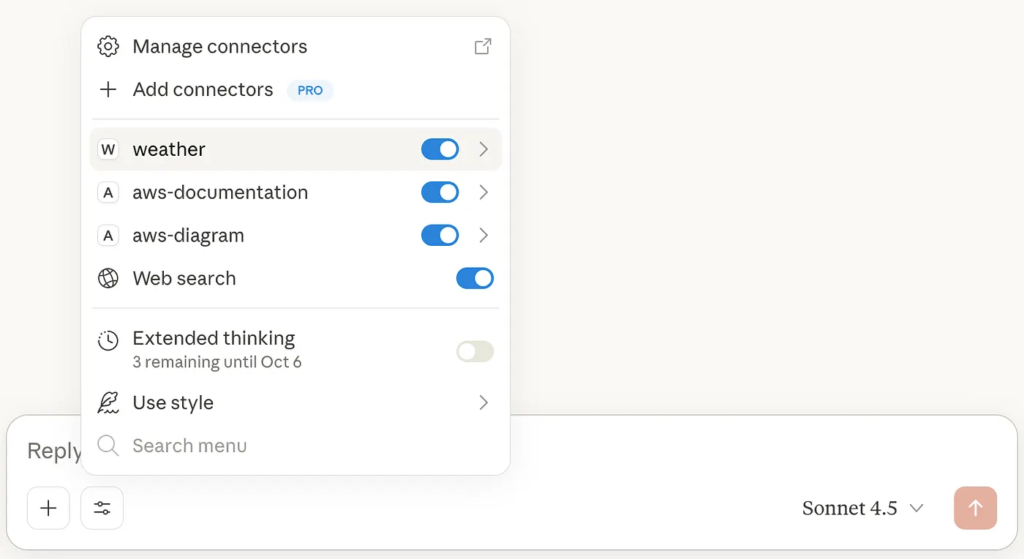
Click in weather slider icon, you should see two tools listed:
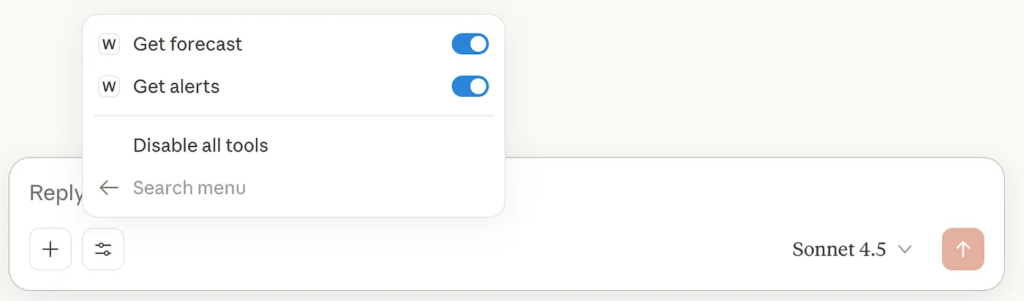
If the tool settings icon has shown up, you can now test your server by running the following commands in Claude for Desktop:
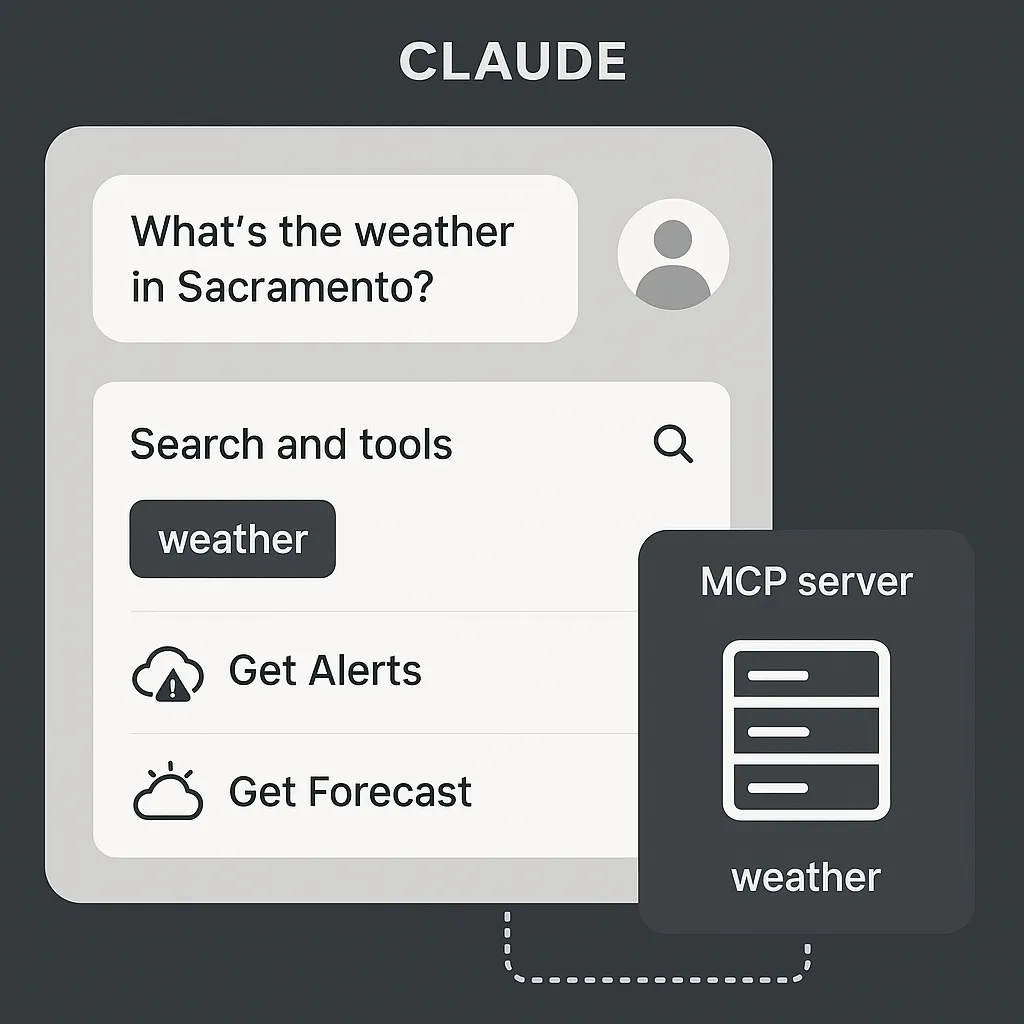
- What’s the weather in Sacramento?
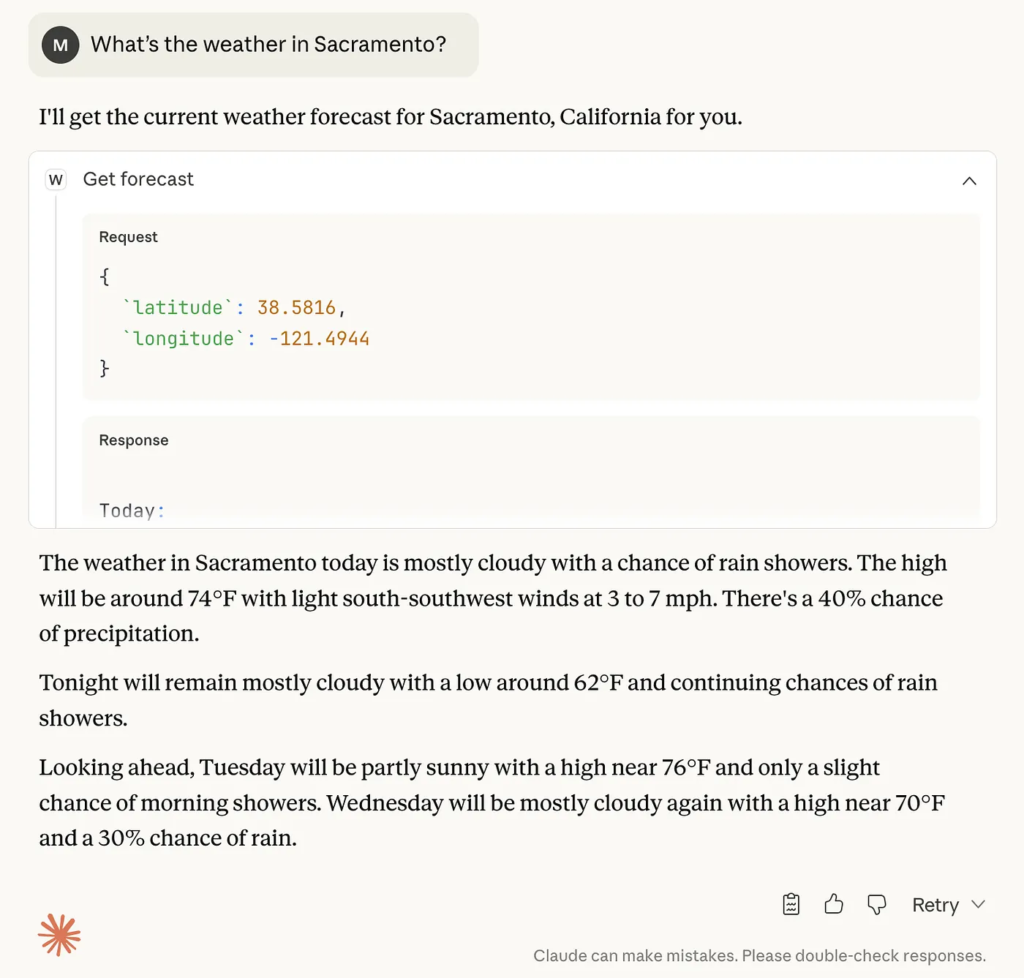
What’s happening under the hood
When you ask a question:
- The client sends your question to Claude
- Claude analyzes the available tools and decides which one(s) to use
- The client executes the chosen tool(s) through the MCP server
- The results are sent back to Claude
- Claude formulates a natural language response
- The response is displayed to you!

