
The world of AI development is more accessible than ever, and for many, the journey begins with an OpenAI API account. Making your initial $5 payment is more than a simple transaction; it’s the critical step that activates your development environment, unlocks higher usage limits, and enables you to start building with powerful AI models. This guide will walk you through the process, from signing up to securely generating your first API key.
Enable OpenAI API Subscription
Sign up for an OpenAI account
- Navigate to the official OpenAI Platform signup page at https://platform.openai.com/ or https://auth.openai.com/create-account
- You can register quickly using your Google, Microsoft, or Apple account, or sign up with a custom email address.
- If you use an email, you will need to complete an email and phone number verification process.
Create initial project and API Key
- Create project and API Key to make your first API call.-
- Copy API Key and make first API call
Bash Command
curl https://api.openai.com/v1/responses \
  -H "Content-Type: application/json" \
  -H "Authorization: Bearer <API Key>" \
  -d '{
    "model": "gpt-4o-mini",
    "input": "write a haiku about ai",
    "store": true
  }'
Python Code
- Follow this article to setup visual studio code environment to run python code in Jupyter notebook.
- Install the OpenAI Python SDK and execute the code below to generate a haiku for free using the gpt-4o-mini model via the Responses API.
!pip install --upgrade pip
!pip install openai python-dotenv

from openai import OpenAI
import dotenv
import os

dotenv.load_dotenv(dotenv_path='.env')

client = OpenAI(
  api_key=os.environ["OPENAI_API_KEY"]
)
response = client.responses.create(
  model="gpt-4.1-nano",
  input="write a haiku about ai",
  store=True,
)
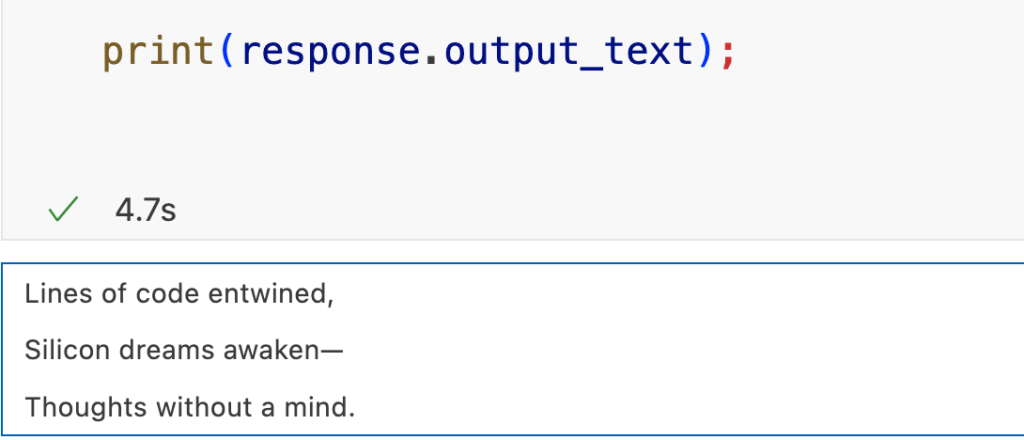
print(response.output_text);- Execute notebook code and that will display output as below,
Add a payment method and pre-purchase credits
- Recommend to check pricing before you Puchase credits.
- Choose the amount of credits you wish to purchase. The minimum purchase is $5, which is what is required for Tier 1 access.
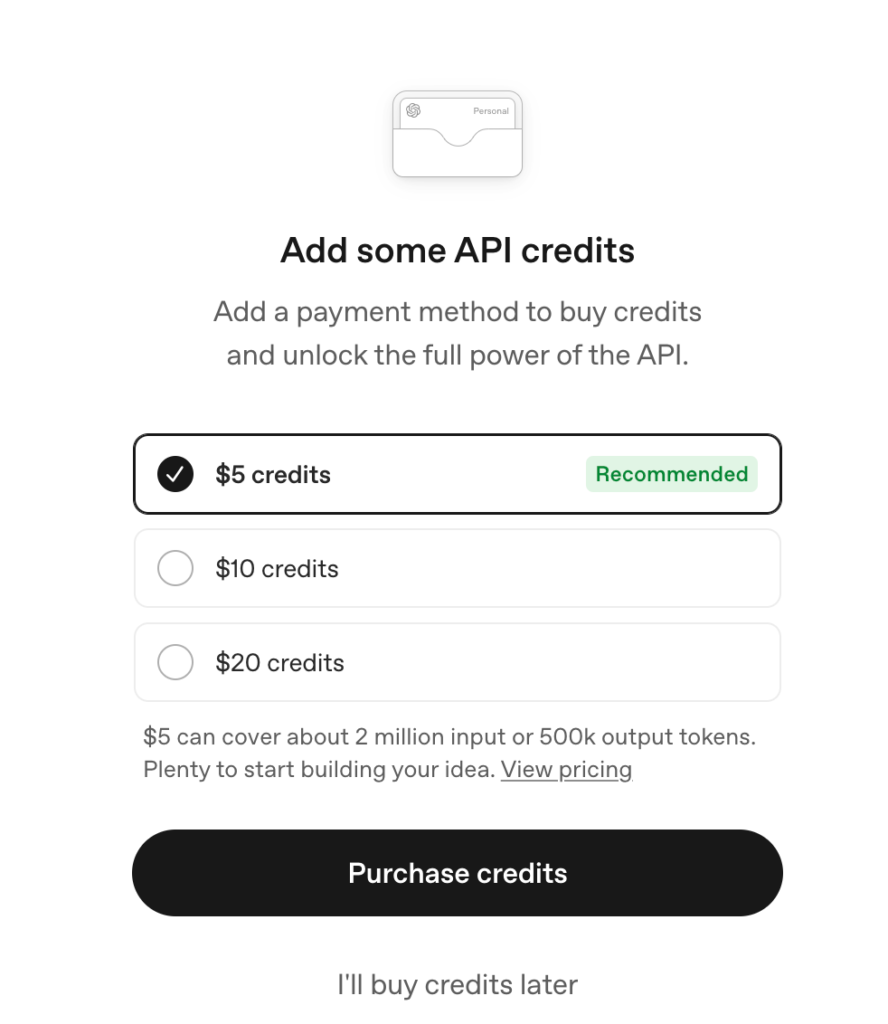
- If payment method popup is not displayed then select Billing from the left-hand menu and then go to Payment methods.
- Enter required details.
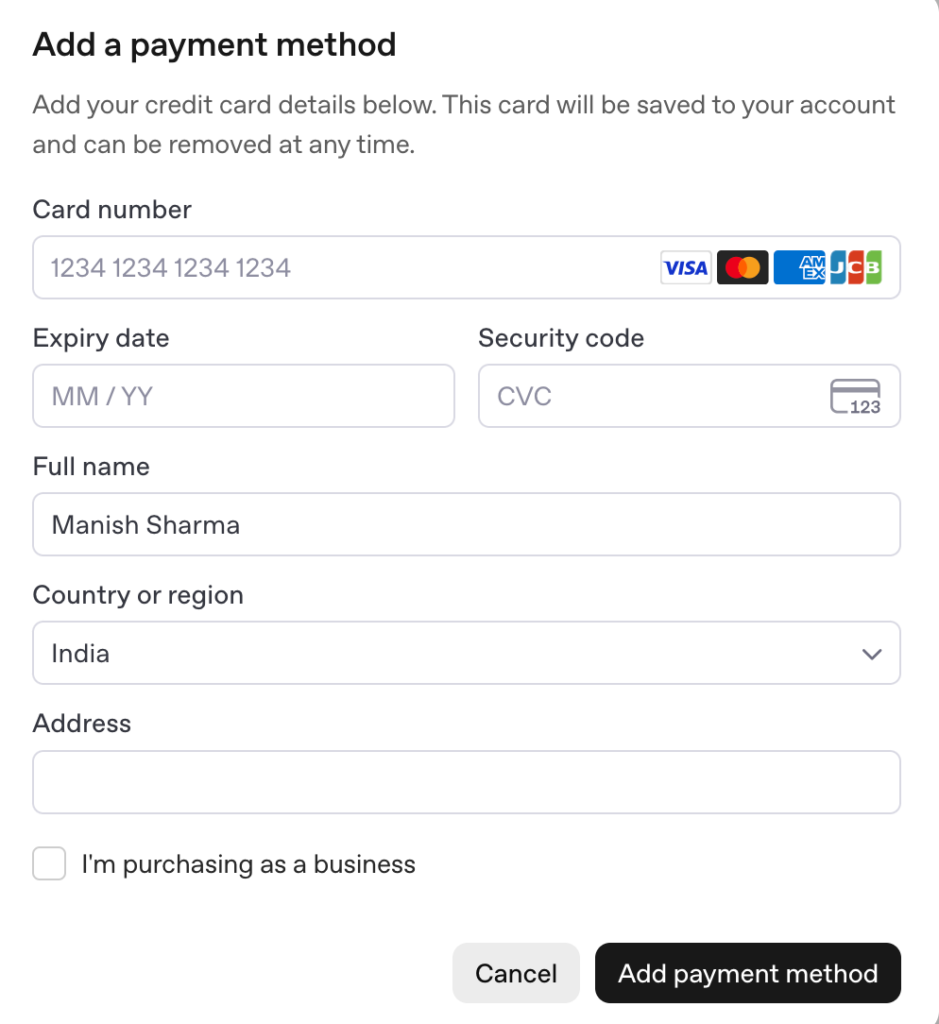
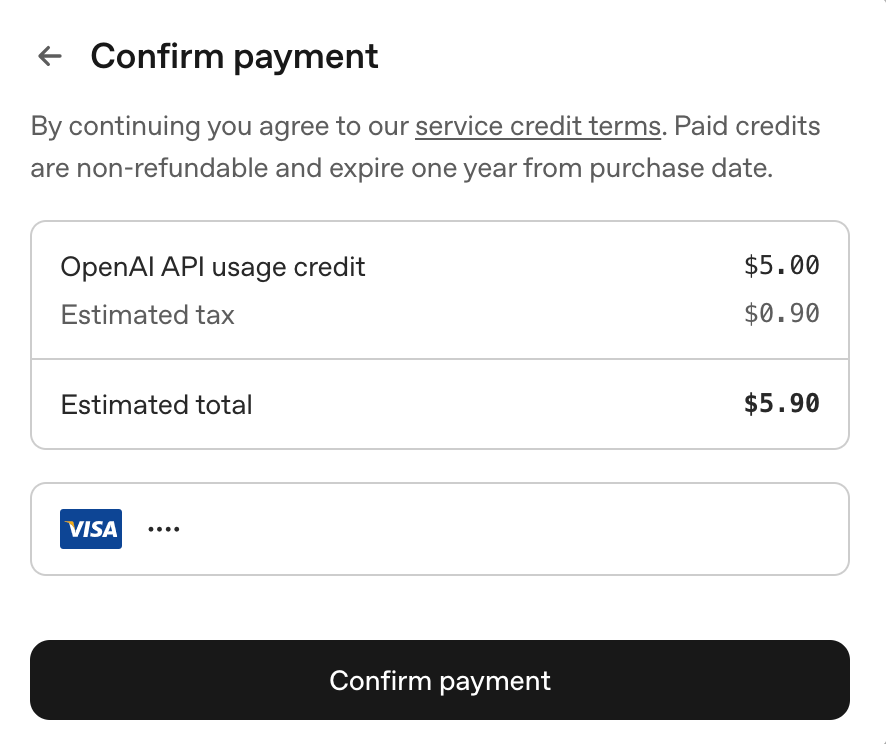
- Confirm for the purchase and complete the transaction..
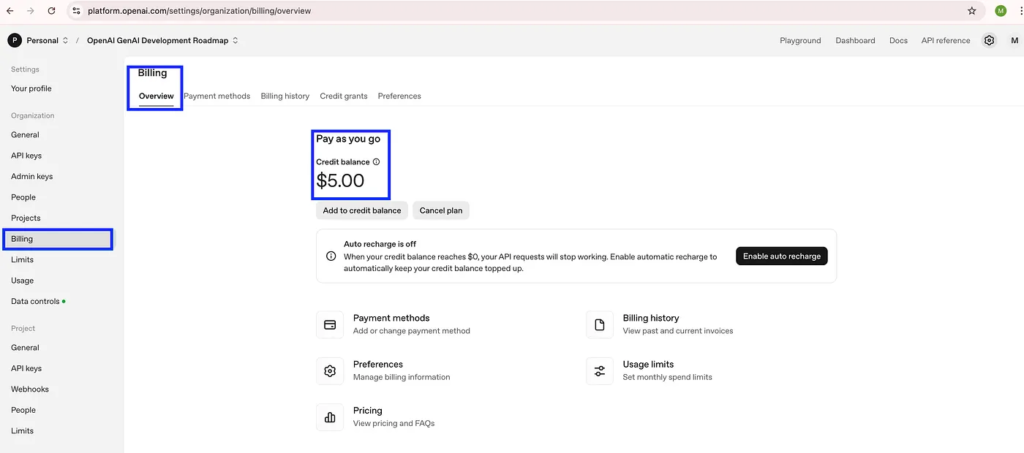
- After payment, you can check your credit balance by navigating to the Billing > Overview section.
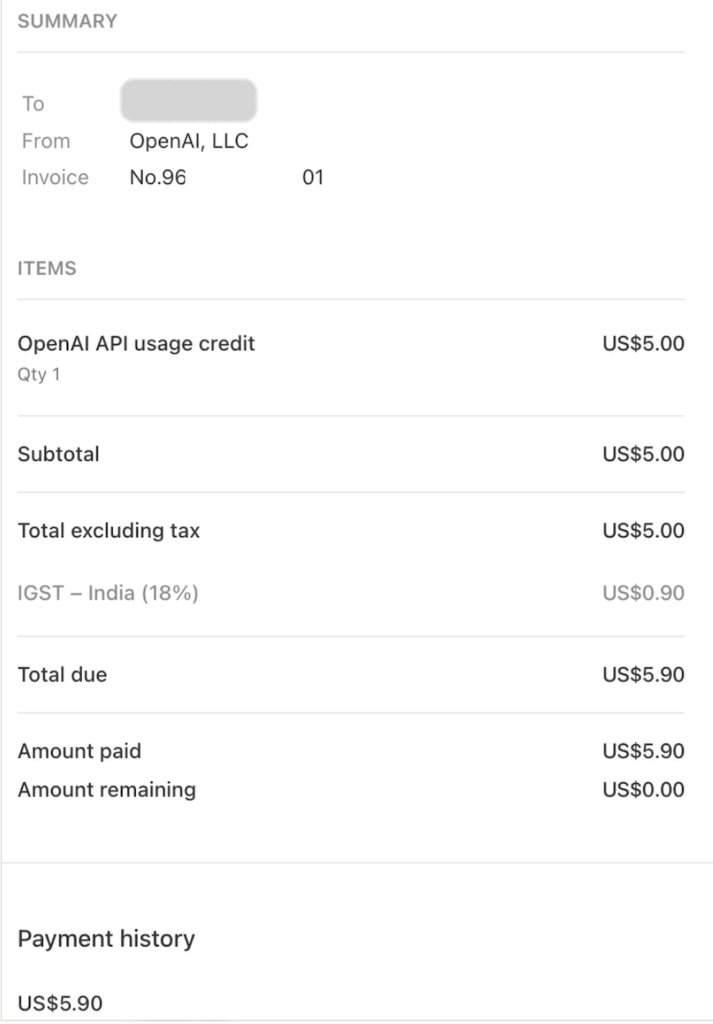
- For prepaid accounts, it is better to check invoice navigating to the Billing > Billing History
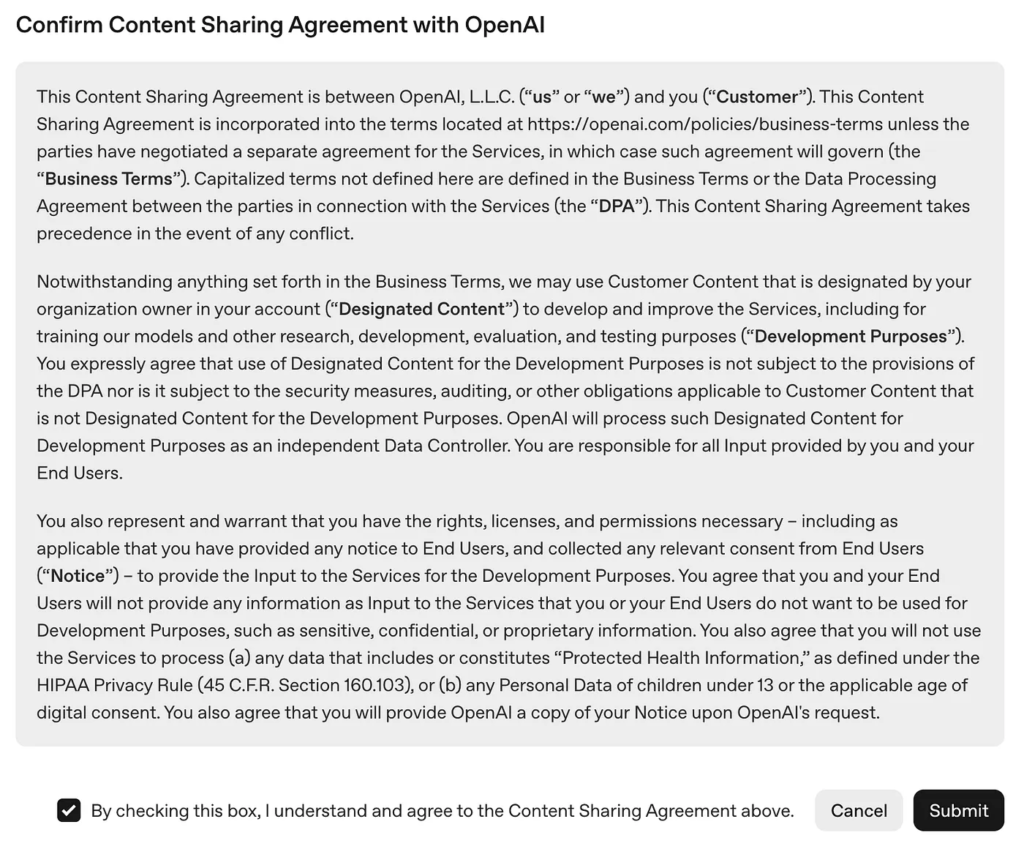
- Apply for free credits against data sharing with OpenAI. This is an excellent option for developers and learners experimenting with the API, as it allows you to explore models at no cost while helping to improve them. However, it is not recommended for enterprise accounts or projects handling sensitive information due to the privacy implications of sharing data that could potentially include confidential or proprietary information.
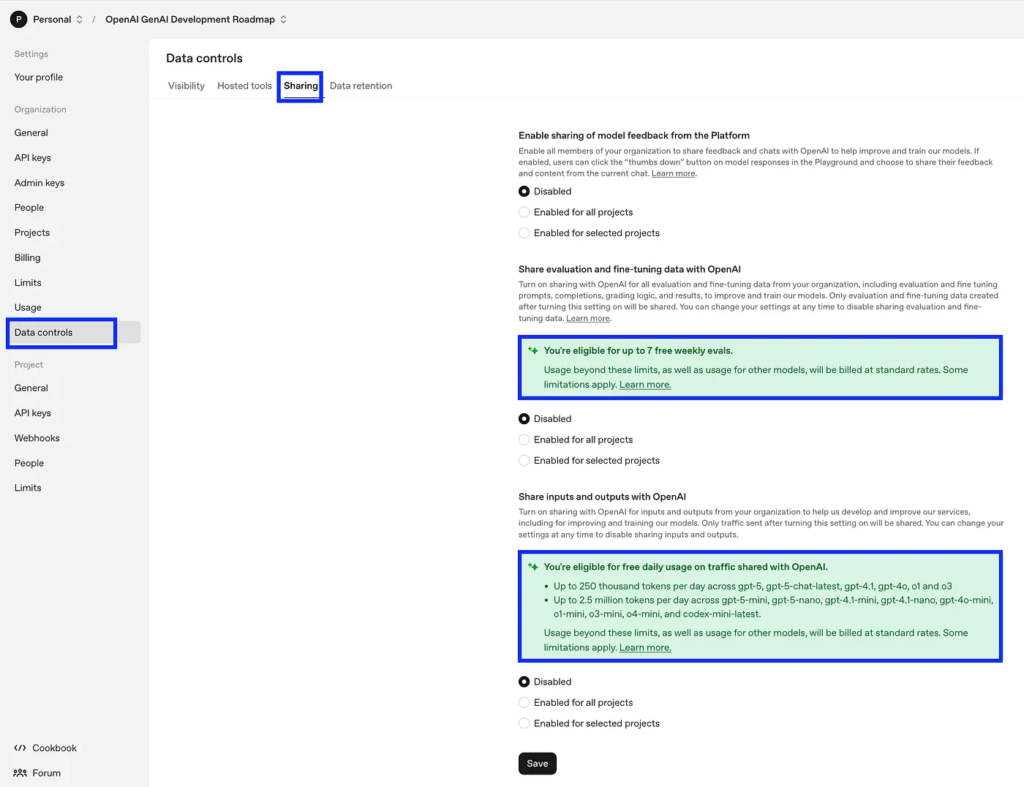
- Read consent sharing agreement before confirming.
Congratulations ! You are all set now.
Best Practises
Adopting technical best practices for OpenAI API management is essential for security, cost control, and efficient team collaboration.
Secure API Key Management
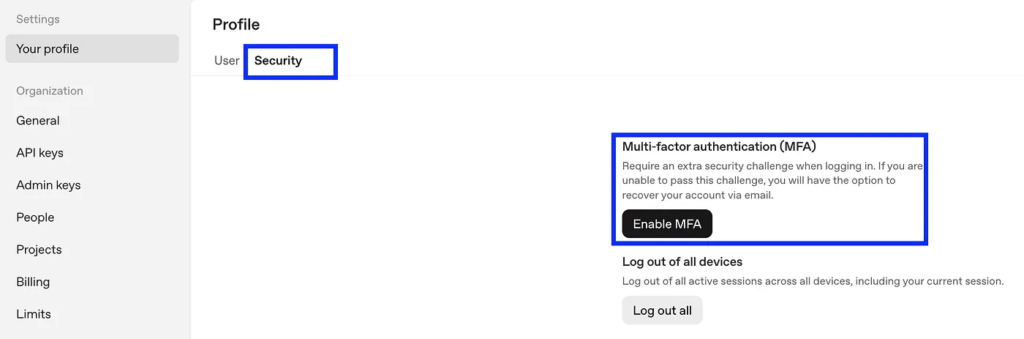
- Require all organization members to enable MFA to add a crucial layer of security against unauthorized account access.
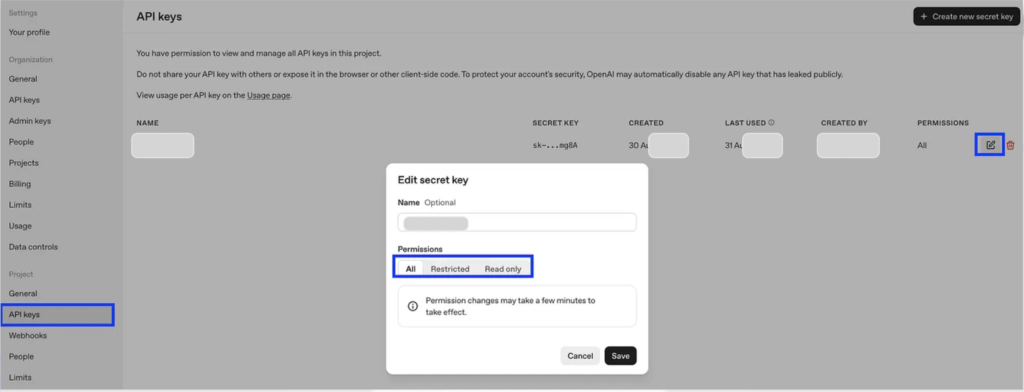
- Create a separate, unique API key for every individual user and for every application or service account that interacts with the API.
- Never hard-code API keys directly into source code. Use environment variables, configuration files, or a dedicated secrets management system
- Set limit on usage of OpenAI APIs for each API Key.
- Establish a policy for regularly rotating all API keys, such as every 90 days. This reduces the risk of compromise and ensures that leaked keys have a limited lifespan.
- Do not use a single “admin key.” Instead, for automation and backend services, generate dedicated keys with restricted permissions based on the principle of least privilege. For example, a key for a monitoring script should only have read-only access to usage data.
Budget and usage limit enforcement
- Create separate projects within your OpenAI organization for different teams or applications. This provides a logical separation for billing, access control, and usage monitoring.

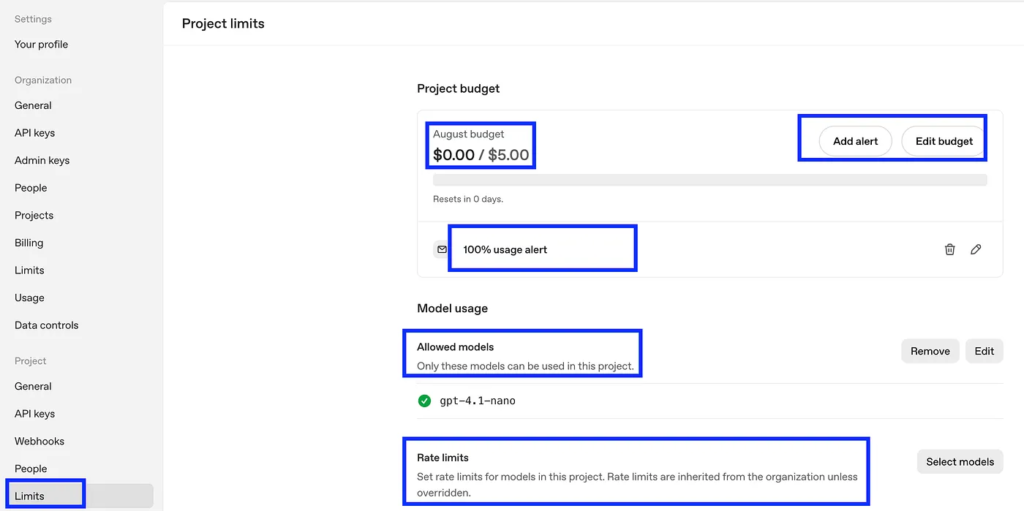
- Assign a monthly spending limit to each project to control costs and enable email alerts when thresholds are reached.
- In addition to project budgets, configure a monthly spending cap for the entire organization. Once this hard limit is reached, all subsequent API requests will be rejected until the budget is increased or the monthly cycle resets.
- Within each project’s settings, explicitly configure which models can be used. This prevents developers from accidentally using expensive models
PermissionDeniedError: Error code: 403 - {'error': {'message': 'Project `proj_YvSVknTZCqXBMjzZumozPSgu` does not have access to model `gpt-4o-mini`', 'type': 'invalid_request_error', 'param': None, 'code': 'model_not_found'}}Monitoring and Automation
- Regularly review the usage dashboard in your OpenAI account to monitor API capabilities and spending categories at both the organizational and project levels. This helps you identify trends, detect anomalies, and make informed decisions about resource allocation.
- Integrate webhooks to receive real-time notifications for critical events, such as when a batch job completes or a fine-tuning task finishes. This enables event-driven automation and responsive workflows without constant polling of the API.
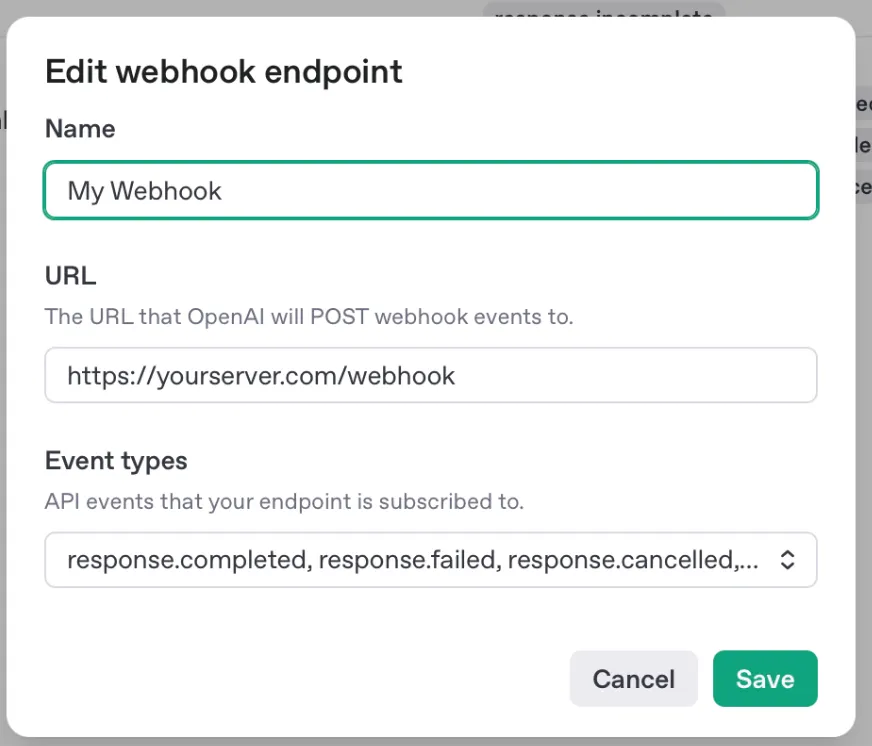
- In addition to budget alerts, configure webhook triggers or email notifications for unusual API activity, such as sudden spikes in token consumption or high error rates, which could indicate a security issue or inefficient application logic.
- Team collaboration
- Invite collaborators to your organization through the Members page. Do not share API keys. Assign users to specific projects with appropriate roles (Owner, Member) to enforce access control and manage permissions effectively.
- Maintain distinct API keys for development, staging, and production environments. This practice minimizes the risk of accidental usage in a live environment and simplifies key management, especially during rotation or revocation.
- Rate limit and performance tuning
- Be aware of OpenAI’s usage tiers, which dictate the number of requests per minute (RPM), tokens per month (RPM), tokens per minute (TPM), and tokens per month (TPD). Your spending level determines your tier and, therefore, your rate limits.
- Add logic to your applications to control the frequency of API calls. This helps prevent your applications from being throttled by OpenAI, which can lead to errors and service interruptions.
- Design your application with robust error handling for 429
Found this guide useful? If so, please consider showing your support by following, liking, and sharing it with your network. Your engagement helps us create more valuable content for the data science community!.
Happy Learning!

